
P52: New Theme and Some iPhone Tips
Here is the lyric for week 2 of Project 52: A Year in Song:
Week 1’s entries were so great, and we are anxious to compile some highlights to share with you next week. We can’t wait to see what you come up with for Week 2!
Pam Korman has decided to tackle the TPW 52-week project with only her iphone. As a little bonus today for our blog readers, Pam is sharing her workflow.
My iPhone Workflow for TPWP52
by Pam Korman
I was so excited when I saw TPW’s theme for their P25 project. I am not usually very good at weekly, or even monthly, theme-based projects but I knew this was one that I could really embrace. I love music and many of my fine art images are inspired by song lyrics so I knew this P52 would be right up my alley.
I am generally a very planned shooter, who often creates heavily edited images, and I knew that wouldn’t really jive with shooting and posting weekly. That got me to thinking. I am always looking to expand my photography skills and I thought this project would be a great opportunity to explore a variety of subject matter and styles and perhaps develop some new abilities along the way. Additionally, since I don’t generally carry my camera on me, I decided to use only my iPhone to capture and edit the images I would create for this project. You should know that I am completely technically challenged so trying to do all of this from my phone is a whole new world for me!
Since I can’t seem to get away from my need to plan, at least some aspect of my shooting, I put together a little flow chart to help make the shooting, processing and sharing of my images a bit more seamless each week. Here is my current plan. I am sure I will revise this along the way and I promise to come back and share any changes I make.
1. I decide on the image I want to take. Next, I decide if I want to create a B&W image or color image. If I want to create a B&W image, I usually take the image using either the Camera Noir or Hueless apps. Otherwise, for color images, I use the camera on my phone unless I really want to play with exposure and focus. When I want to control the point of focus and the exposure of the image separately, I shoot the image using the Camera+ app.
2. Next, I add the image to my to TPWP52 Album on my phone. I created a separate album to help keep track of my images.
3. Then I edit the image using any of a number of apps that I have but my current favorites include: Camera+, Filterstorm, Afterlight, Snapseed and VSCO. I also have Retouch, Photostudio, ScratchCam and PS Express but I haven’t played with them much yet but plan to over the next few weeks.
4. Then I sharpen my image if necessary. For my image this past week, I used the sharpen filter in Filterstorm.
5. Lastly, I add my watermark and metadata using the Marksta app.
6. Exporting is where things get a bit daunting. I want to post my TPWP52 images to my Facebook (personal and business), Flickr (personal), Pinterest (personal and business) and Instagram (personal) accounts with the #TPWP52 hashtag and on the forum in the weekly TPWP52 thread (note: I post on the forum via Flickr). And, also on my blog but that is less important for this tutorial. That is clearly a lot of posting and I want to make things as streamed lined as possible. Here is how I decided to approach it.
For a square image it is pretty easy. Once I add my watermark in Marksa, I bring the image into Instagram and from there I upload it to Instagram, Facebook, Flickr and I email myself a copy. I use the emailed copy to upload to Pinterest, post on my blog and also to keep in a file for a photo book I am creating with my P52 images. More on that in another post. I add the image that was uploaded to Flickr to TPWP52 Flickr group and I also use it to post the image on the forum on the P52 weekly thread. Done!
When I want to maintain the original crop of the image, and keep the watermark in the lower right corner where I like it, it takes a few more steps. Once I add the watermark to the image with the original crop, I then bring the image into Camera+ and share it to Facebook, Flickr and email it to myself from there. (Note-this is the version of the image that will be shared in the Flickr group, on Pinterest, on the Forum and on my blog.) While I am still in Camera+, I crop the image square, go back to Marksa and re-add a watermark (since it was now cropped off) and then go to Instagram and share it there. Only the square crop will be on Instagram. A bit more complicated but it gets the job done.
On side note, yesterday I was just getting info on the InstaSize app from my extremely techie and helpful friend Sarah Mazza. That might actually solve some of this but I need to play around with that app and see.
So that is where I am after week 1 of this journey. I hope I have perhaps inspired some of you to join me. And, for all of you (and I know that is MANY of you) who are way more versed in iPhoneography than I am, I would love to hear any ideas or thoughts you have to make this easier, better or just more fun!!
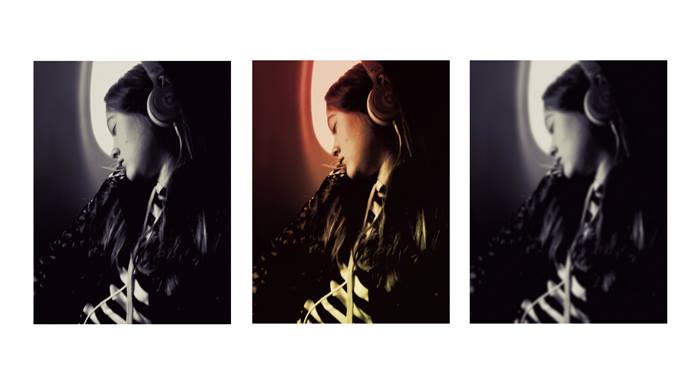
And, here is my image from week one. Well, images, since I couldn’t decide the edit I liked best.
 Pam Korman:
District Photography
Pam began her photography journey in 2010 when she first picked up a DSLR. She is a dedicated hobbyist who enjoys shooting both digital and film and loves exploring a wide range of photographic subjects, techniques, cameras and lenses. She lives outside Philadelphia with her husband and three energetic teenagers. She happily admits to a coffee and chocolate chip cookie addiction and don’t be surprised if you get an email from her at 5 AM since she loves being up before the sun.
You can also find Pam on Facebook, Pinterest, and Instagram.
Tags: 52 Week Project, Photo Projects, photography forum, photography tutorial, Project 52, the photographer within
Categorized in: Guest Bloggers, Project 52
3 Comments
I love how organized you are!!
This is all such wonderful information! I was perusing through the iPhoneography forum on TPW the other day and a lady ( I can’t remember who) mentioned the Bokeh Lens app which I really love because it gives you wonderful DOF. It’s especially great for food pictures on your iPhone. Just thought I’d share here as well since it is my goal to become a better iPhoneographer:)
Pam these tips are awesome! thanks so much for sharing!!